
Install Apache Web Server on Ubuntu.
What is Apache?
The Apache HTTP server is the most widely-used web server in the world. It provides many powerful features including dynamically loadable modules, robust media support, and extensive integration with other popular software. You can also integrate it with PHP and SQL. It runs on 67% of all web servers in the world. It is fast, reliable, secure and can be highly customizable to meet the needs of many different environments by using extensions and modules.
You can find more details about Apache on their own Website, Just click on Apache here.
Before proceeding to the guide, please install Apache using out Install PHP on Ubuntu Guide.
Install PhpMyAdmin as well, as it is part of LAMP too. Use our other guide for that – Install PhpMyAdmin on Ubuntu .
LAMP Installation.
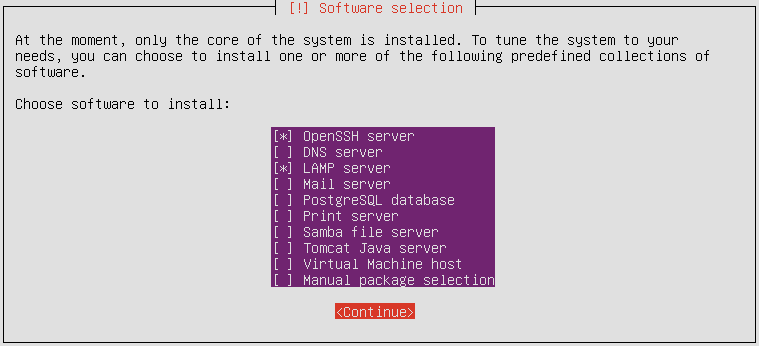
While installing Ubuntu, near the end of the installation, you will get this kind of list, where you can install LAMP server (Linux Apache MySQL and PHP). If you select it here, then you have to do nothing, as it is preinstalled on your system. However, if you haven’t, Please follow the guide further.
Install Apache on Ubuntu.
The following command will update your system as well as install Apache 2 in 1 go. The command also requires sudo or root user to run it.
sudo apt-get update && sudo apt-get install apache2
Set Global ServerName.
Once you install the Apache Web Server, you will need to Set Global ServerName to abolish any Syntax Warning like the following.
AH00558: apache2: Could not reliably determine the server's fully qualified domain name, using 127.0.1.1. Set the 'ServerName' directive globally to suppress this message
You will get the above warning when you run the following Apache Configuration Test command. Again with sudo.
sudo apache2ctl configtest
To overcome the above error, just open the following file using the command below.
nano /etc/apache2/apache2.conf
Search for “ServerName”, You can search it by pressing Ctrl+W together and typing it in. This feature is available in nano. And then just change the value of ServerName to IP or Server Domain Name.
. . .
ServerName server_domain_or_IP
After this, run the config test again and the output should be “Syntax OK”.
sudo apache2ctl configtest
Access Apache Web Server from Browser.
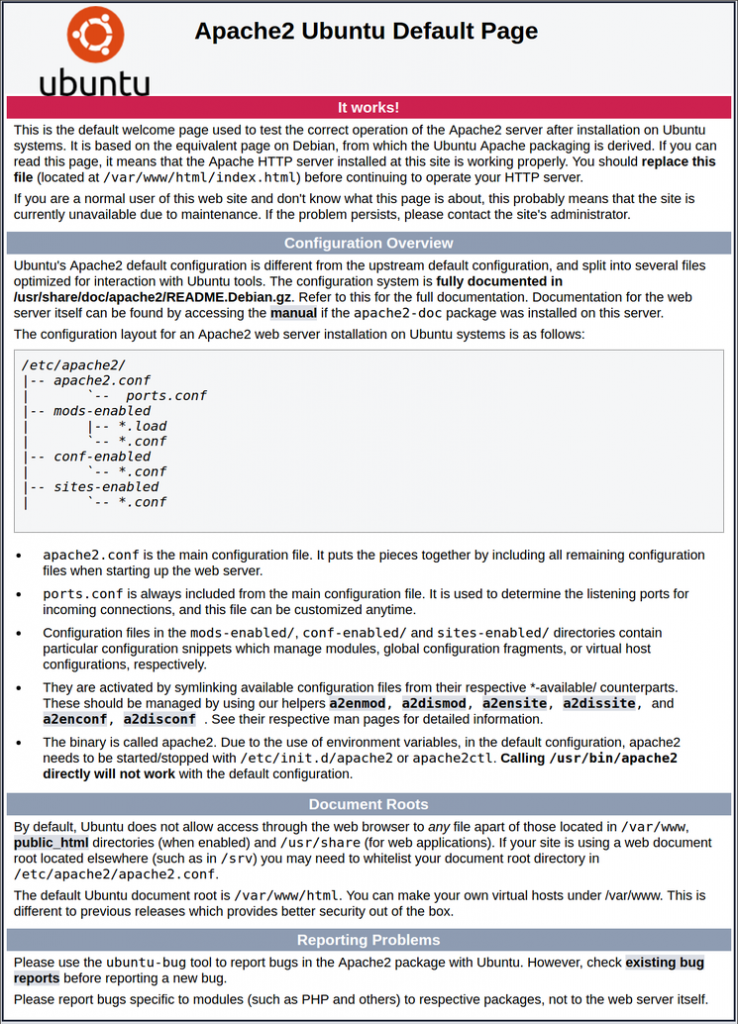
Now you should be able to access the server using the main IP Address or Hostname. Just put it on your browser, press enter and you will get the following page.
That’s it, That’s how you install Install Apache Web Server on Ubuntu.
Do consider subscribing to our Linux VPS services for it, we have preinstalled Ubuntu as well that comes with various panels.
Ready for High-Performance Hosting?
Experience lightning-fast speeds with our premium hosting solutions
Explore Our Plans →🎯 Get Started with SnTHostings Today
Join thousands of satisfied customers with instant setup and 24/7 support